-3.png?height=120&name=MecaLogo-Black%20(1)-3.png)
This article focuses on the installation of the MPM500 pneumatic module on the Meca500 R3 industrial robot's wrist. The module's basic functioning is presented, but more detailed technical information can be found in the MPM500 User Manual. MPM500 is a custom pneumatic module, designed for seamless integration with the Meca500 R3. The module is easy to install, connect and dismount, when needed. This add-on allows for an easy use of a large variety of pneumatic grippers, tool changers and suction cups.
TABLE OF CONTENTS
Equipment and tools
- Meca500 R3 industrial robot: Go to link
- MPM500 pneumatic module: Go to link
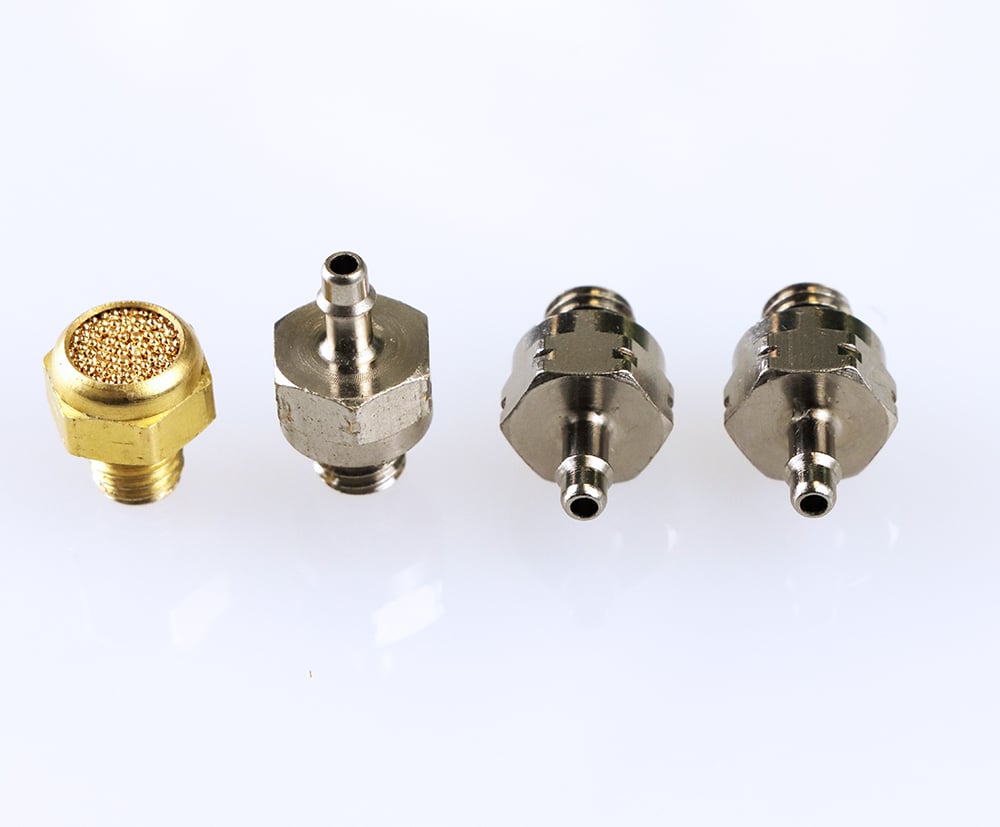
- M5 threaded barb fittings: provided with the MPM500 and preinstalled
OR
- M5 threaded push-to-connect barb fittings : not provided, McMaster reference
- 2.5 mm Allen key: Purchased separately
- 1/16 in pneumatic cables: Purchased separately
Prior to installation
Before installing or operating the MPM500, please read carefully the MPM500 User Manual, as it provides detailed information and schematics. The MPM500 pneumatic module must be installed before powering, activating or homing the Meca500 industrial robot.
Step-by-step tutorial
Step 1: Mounting the module
Slide the MPM500 module on top of the Meca500's wrist, aligning it with the robot's female electrical connector.
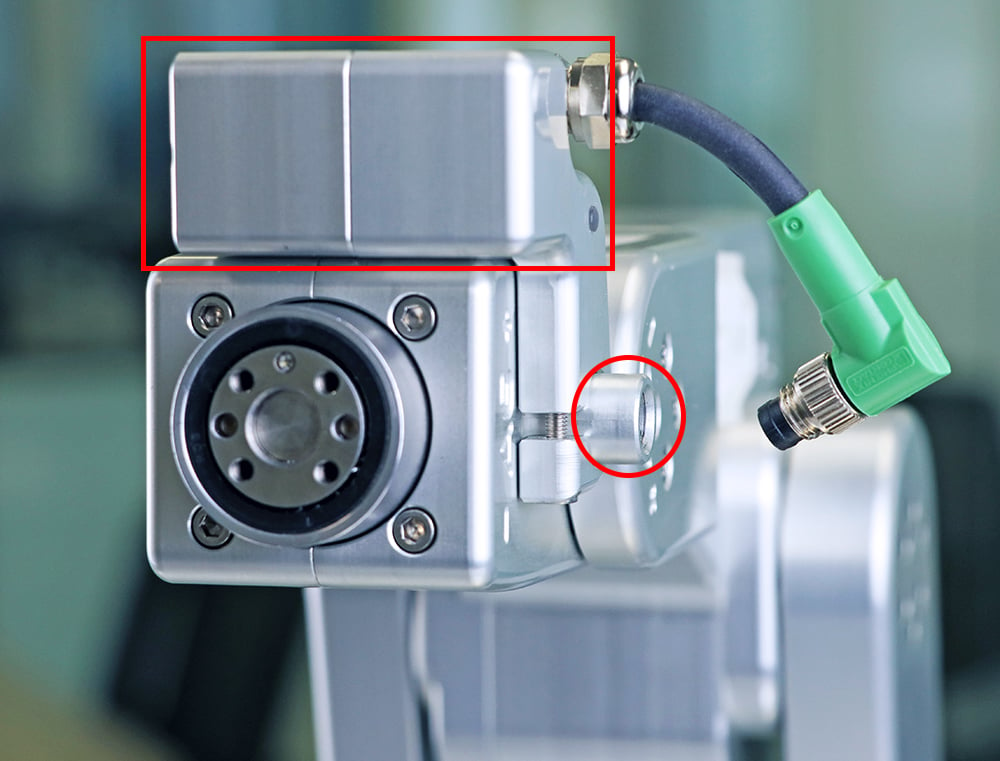
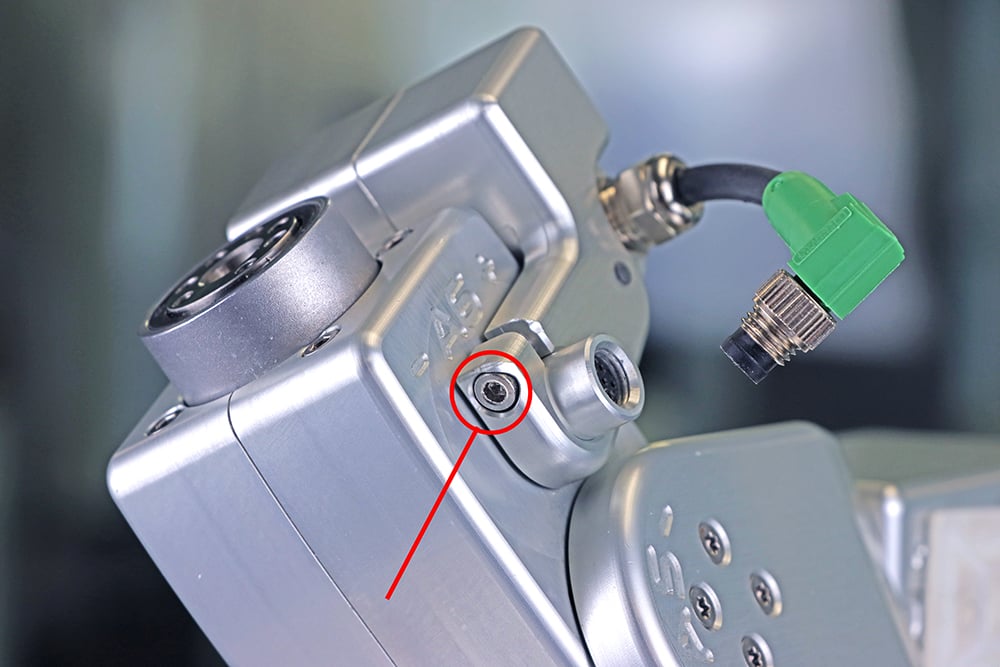
Step 2: Securing the module
Tighten the screw of the clamp with the Allen key in order to secure it in place.
Step 3: Electrical connection
Connect the 6-pin SDLR cable to the Meca500's electrical connector

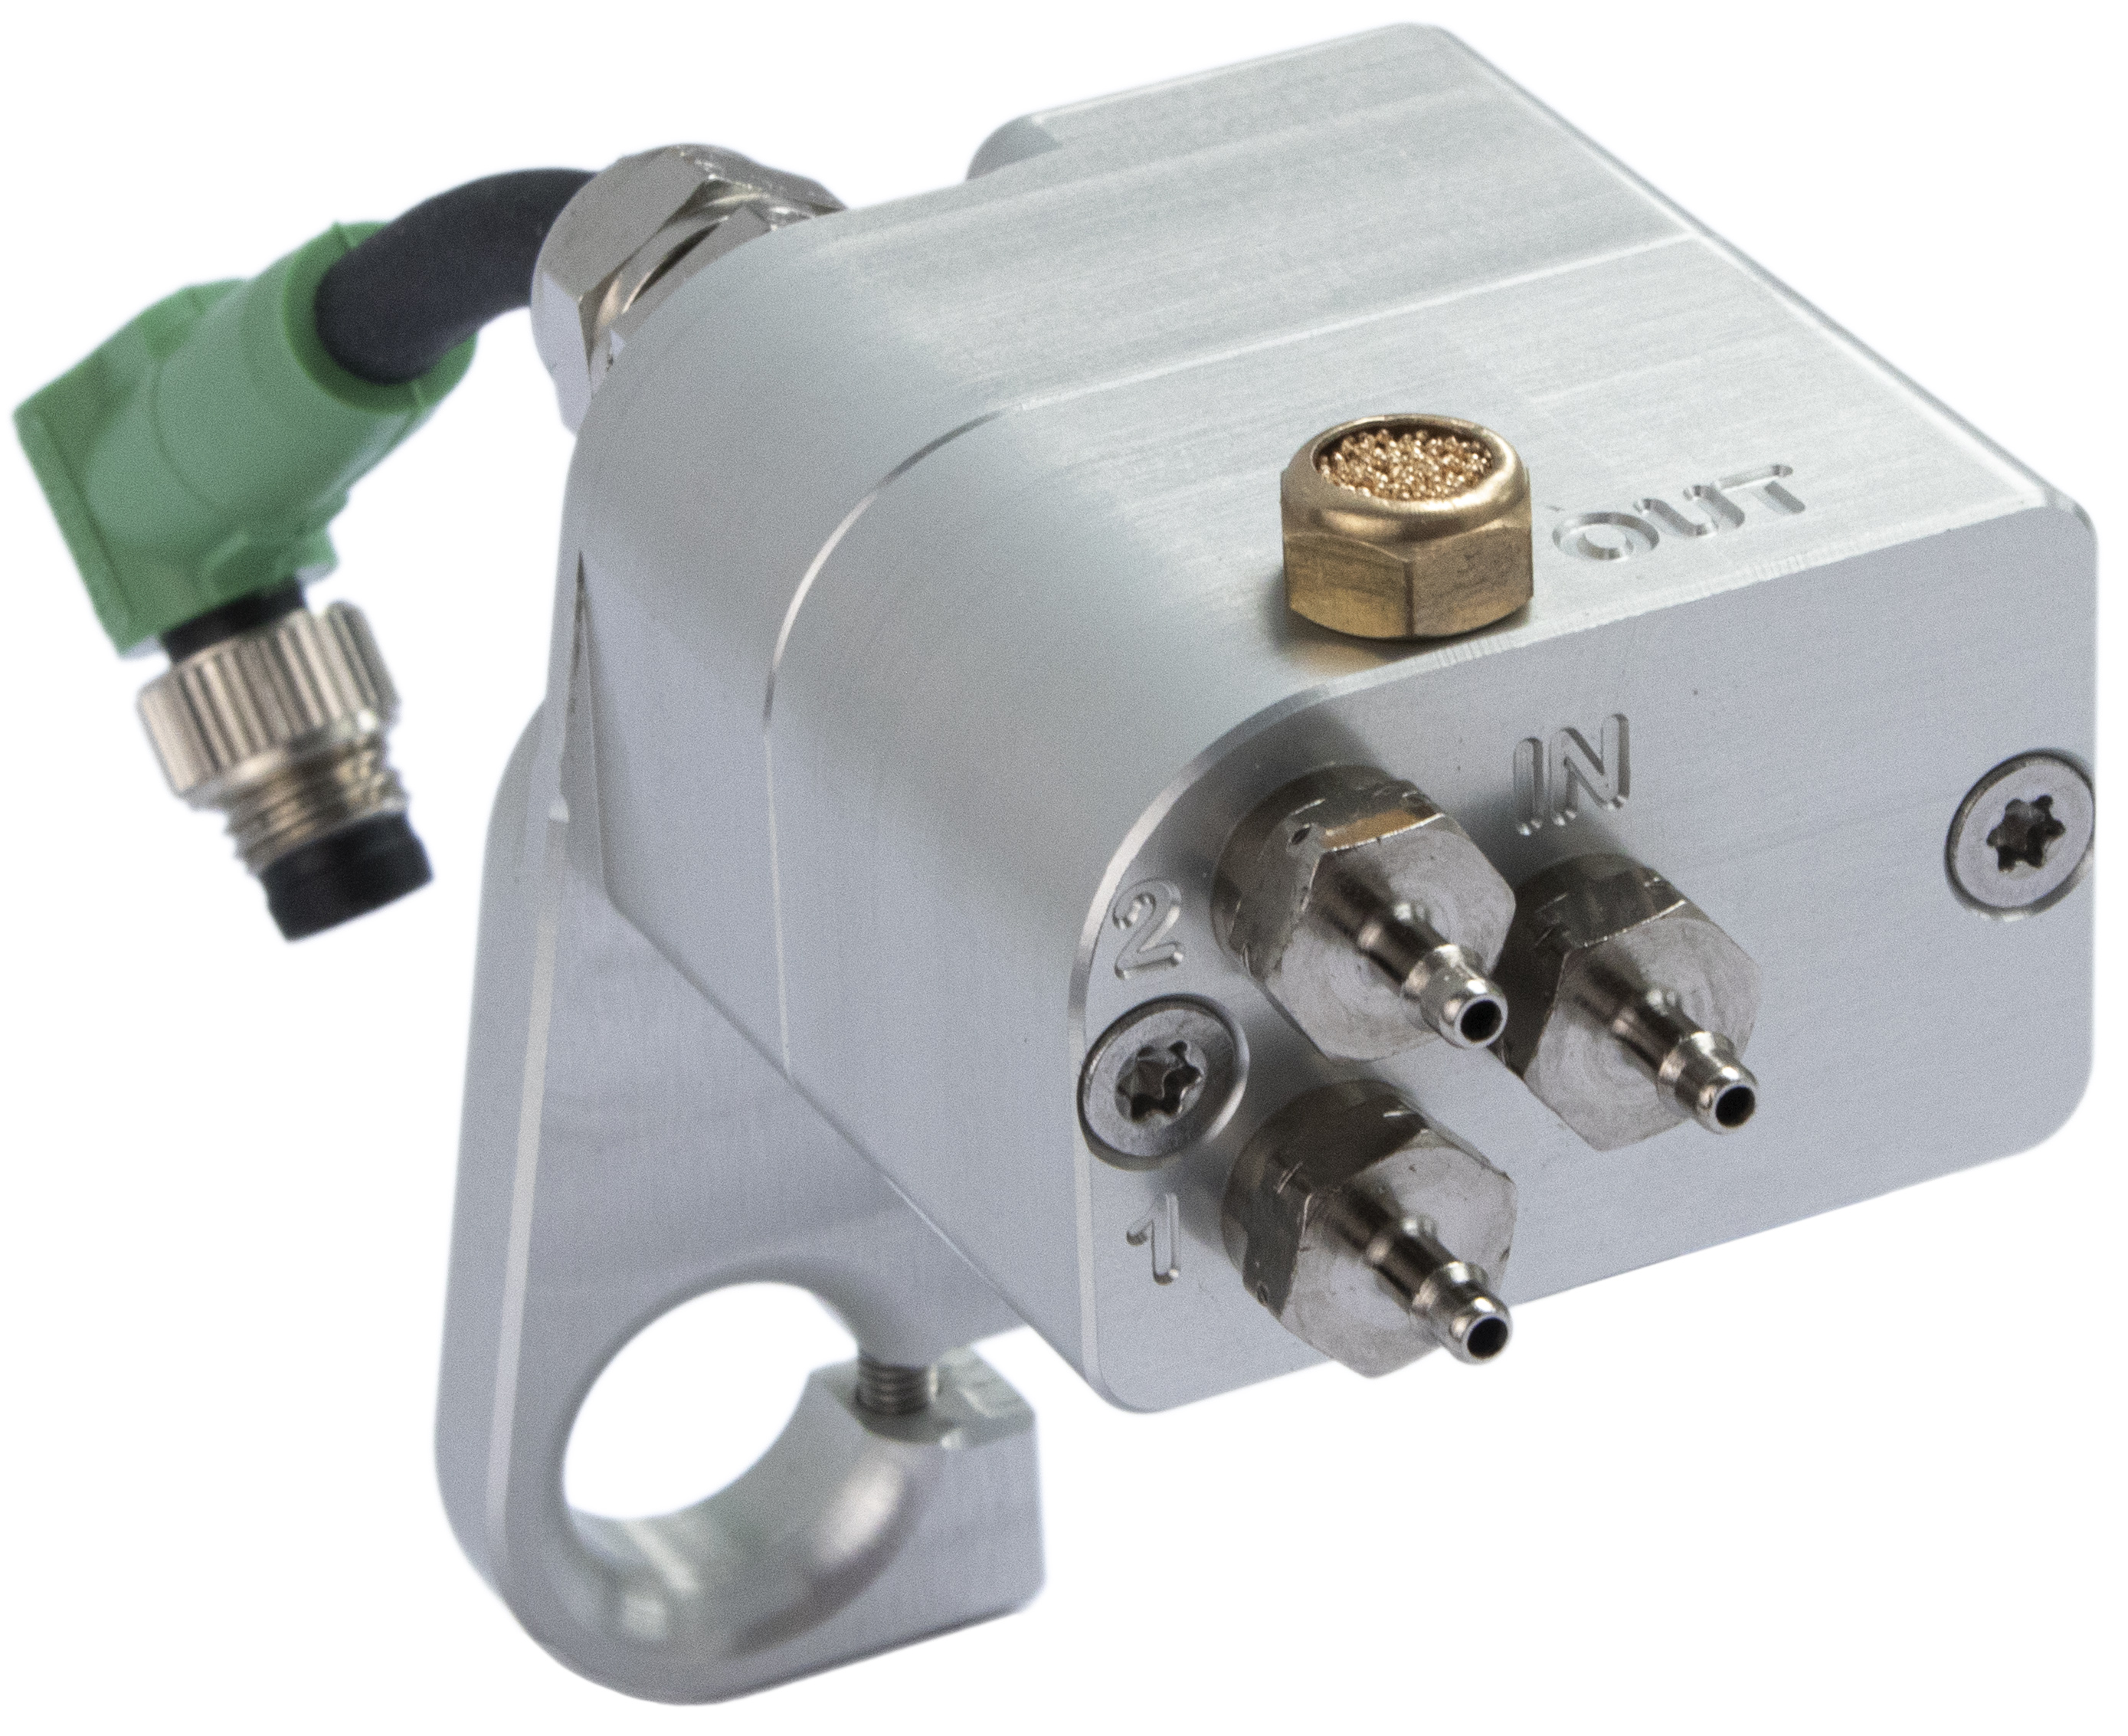
Step 4: Barb fittings
To complete the set-up, install the provided barb fittings and the pneumatic silenced, if needed. You can also install push-to-connect barb fittings in order to easily connect and release the pneumatic cables. Note that when you first receive your MPM500, all fittings are preinstalled.
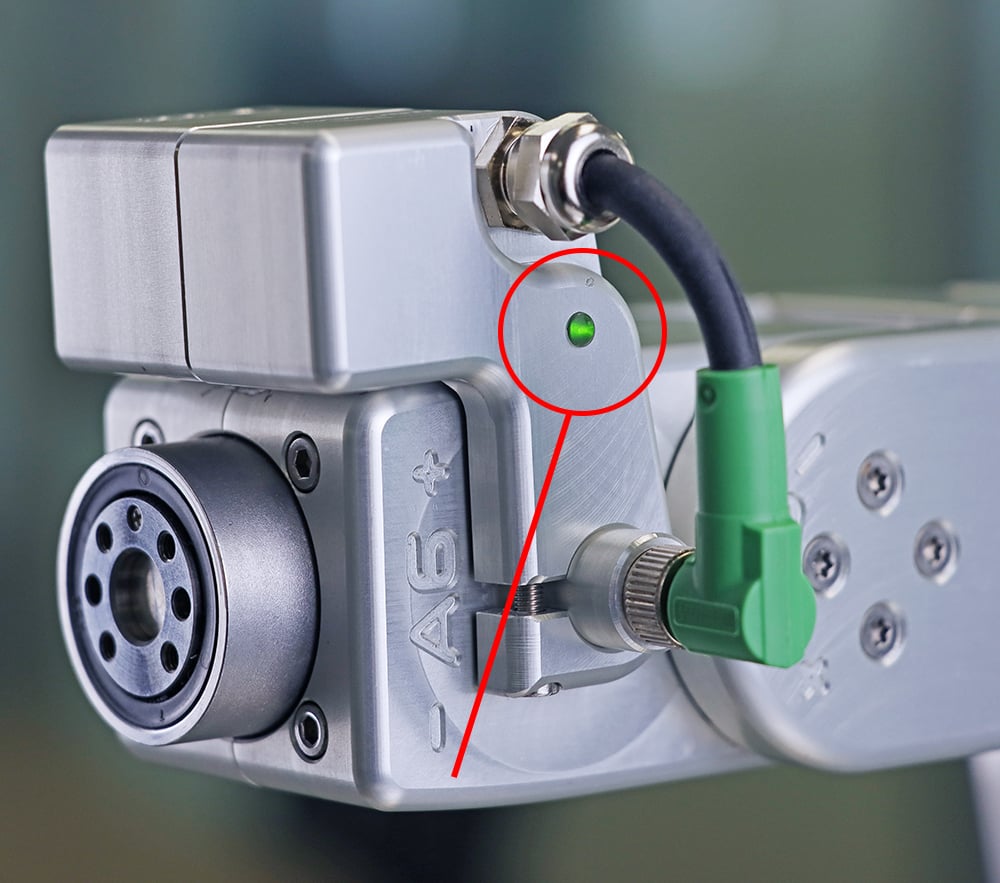
Step 5: Powering
Power the Meca500 (see its User Manual for more information). Then, activate and home the robot. The MPM500 module's green LED should emit steady light after activation. This indicates that the electrical connection is functional.
Step 6a: Pneumatic circuit
The MPM500 makes it easy to connect double-action pneumatic grippers and tooling. The module integrates two 3/2 NC solenoid valves, working interdependently. To connect your end-of-arm tooling (EOAT), please follow these instructions:
- Introduce compressed air into the MPM500's IN port;
- Connect the MPM500's port 1 to the EOAT OPEN port (or A port);
- Connect the MPM500's port 2 to the EOAT CLOSE port (or B port).
Prior to v9.1
It is important to note that because of the interdependent operation of the valves, any pneumatic grippers have only two positions: open and closed.
These positions are activated with the GripperOpen and GripperClose commands, sent directly to the Meca500.
Since v9.1
The user can control each valve independently using the command SetValveState.
Concrete examples
- MPM500 pneumatic module integration with Schunk KGG 60-40 pneumatic gripper
- MPM500 pneumatic module integration with Schunk MPZ-30 pneumatic gripper
- MPM500 pneumatic module integration with Schunk MPG Plus-25 pneumatic gripper
- MPM500 pneumatic module integration with SCM JMHZ2 12D pneumatic gripper
- MPM500 pneumatic module integration with Kosmek SWR 0100 pneumatic tool changer
Step 6b: Vacuum circuit
For vacuum circuits, direct vacuum lines or venturi vacuum pumps can be used. For both options, please follow the step below:
For the vacuum circuits, only one of the valves is used. As both valves operate in the exact same manner, the vacuum toggle is executed at the same time.
Option A: Venturi vacuum pump
- Connect compressed air to P+ port of the venturi pump
- Connect P- port of the venturi pump to the OUT port of the MPM500 pneumatic module;
- Connect the EOAT (suction cup) to the port 1 or port 2 of the MPM500 pneumatic module.
Option B: Direct vacuum line
- Connect direct vacuum line to the OUT port of the MPM500 pneumatic module;
- Connect the EOAT (suction cup) to the port 1 or port 2 of the MPM500 pneumatic module.
Concrete examples
- MPM500 pneumatic module integration with Schmalz SBP-HV basic ejector
- MPM500 pneumatic module integration with Bimba venturi vacuum pump
Video tutorial
After installation
The use of the MPM500 pneumatic module is straight forward. However, bear in mind that it needs to operate within its technical limits, as well as within the limits of the chosen EOAT. For more detailed technical information, please read carefully the MPM500 User Manual.