-3.png?height=120&name=MecaLogo-Black%20(1)-3.png)
|
|
 |
 |
 |
-3.png?width=335&height=96&name=MecaLogo-Black%20(1)-3.png)
This MecaNetwork example features the Meca500 industrial arm, the MPM500 pneumatic module and the Schunk MPG Plus 25 pneumatic gripper. The gripper is attached to the Meca500 with a custom bracket. Custom fingers are used for the pick-and-place action. The 3D model of the bracket is provided below and is free to use. The gripper is controlled directly by the MPM500 pneumatic module. The provided demo showcases a simple pick-and-place example.
TABLE OF CONTENTS
Components
- Meca500 Robot: Go to link
- Meca500 firmware version 8.1.6 or above is required: Go to link
- Mecademic MPM500 pneumatic module: Go to link
- Schunk MPG Plus-25 pneumatic gripper: Go to link
- Custom bracket : Available for download at the bottom of the page
- M5 threaded barb fittings: Included with the MPM500 module OR Push-to-connect barb fittings: McMaster reference
- M3 threaded barb fittings: Purchased separately for the gripper
- M3 x 0.5 screws (x6): For mounting the bracket and to both the Meca500 and the gripper
- M4 x 0.7 screws (x2): For mounting the fingers on the gripper
- 1/16 in ID or 4mm OD pneumatic cables: Purchased separately
Technical specifications of the gripper
- Gripper for small components
- Double-acting
- Direct driven jaw
- 3 mm stroke per jaw
- Closing force: 38 N
- Opening force: 32 N
- Weight: 0.06 kg
- Recommended work piece weight: 0.19 kg
- Max operating pressure: 8 bar
- Repeat accuracy: 0.02 mm
- Dimensions: 26 x 18 x 27 mm
Assembly
Before assembly or operation, please refer to the Meca500 User Manual and the MPM500 User Manual. It is also recommended to visit the How to install the MPM500 pneumatic module page in order to ensure a functioning set-up before adding the gripper. The article lists the assembly steps required after the successful installation of the MPM500 pneumatic module.
Assembly steps:
- Attach the fingers with M4 threaded screws;
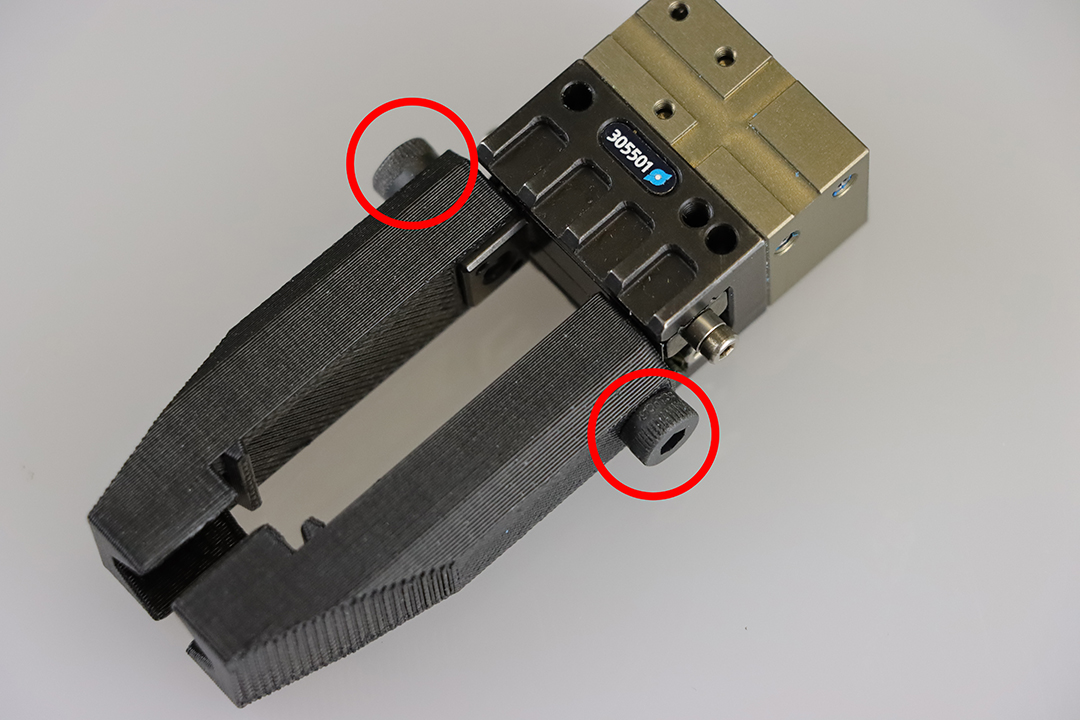
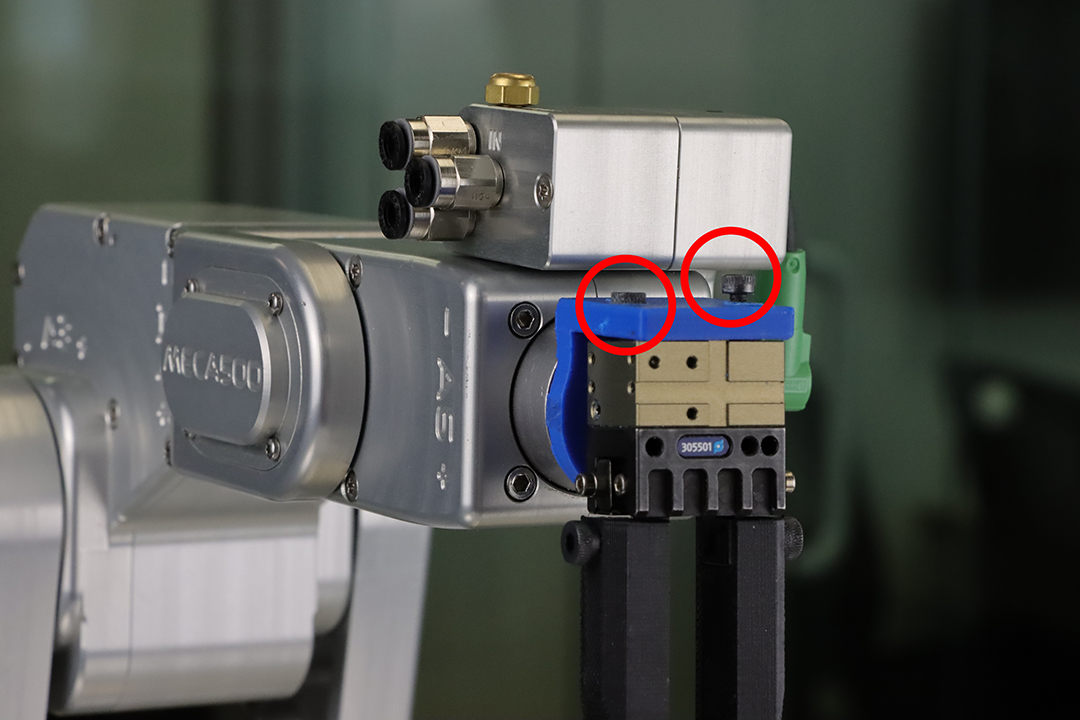
- Attach the custom bracket to the Meca500's flange using the M3 screws;
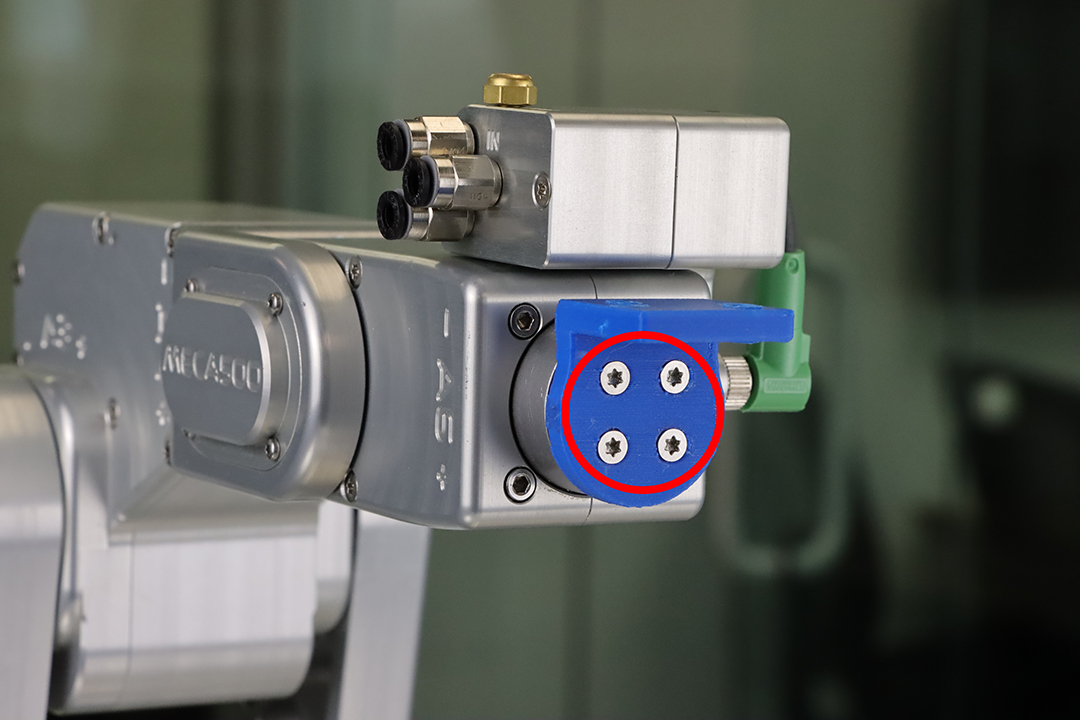
- Attach the gripper to the custom bracket. The gripper is oriented at 90 degrees relatively to the flange, pointing downwards.
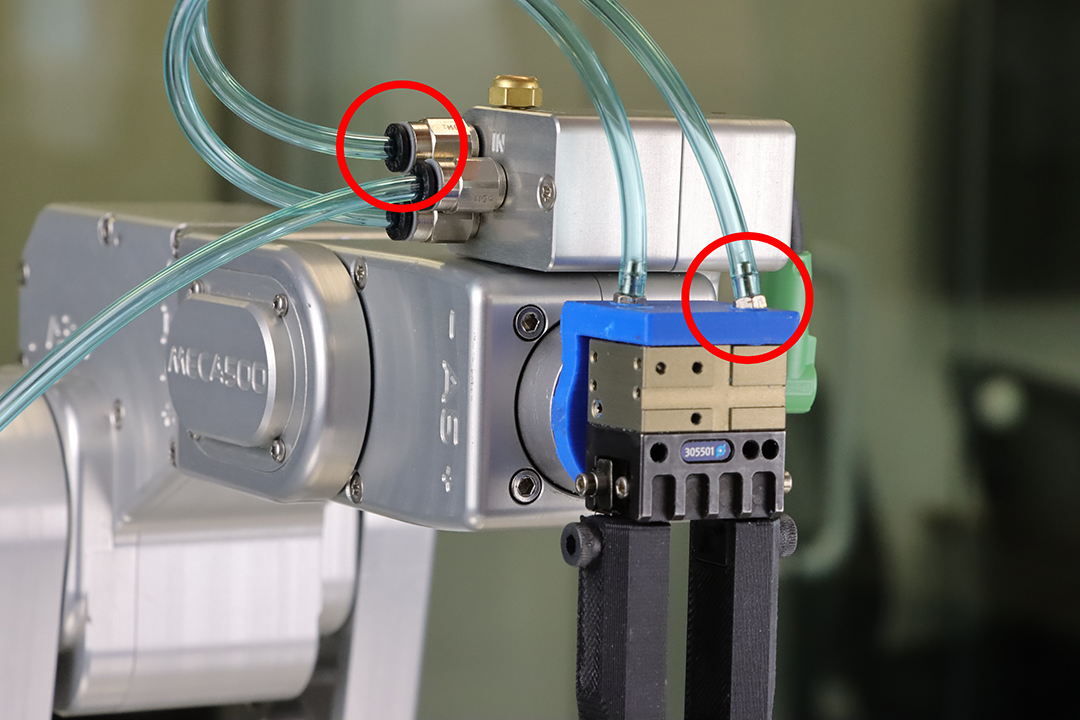
- Attach the barb fittings or the push-to-connect fittings to the gripper and the MPM500 module (if needed);
- Attach air input to port IN (Meca500);
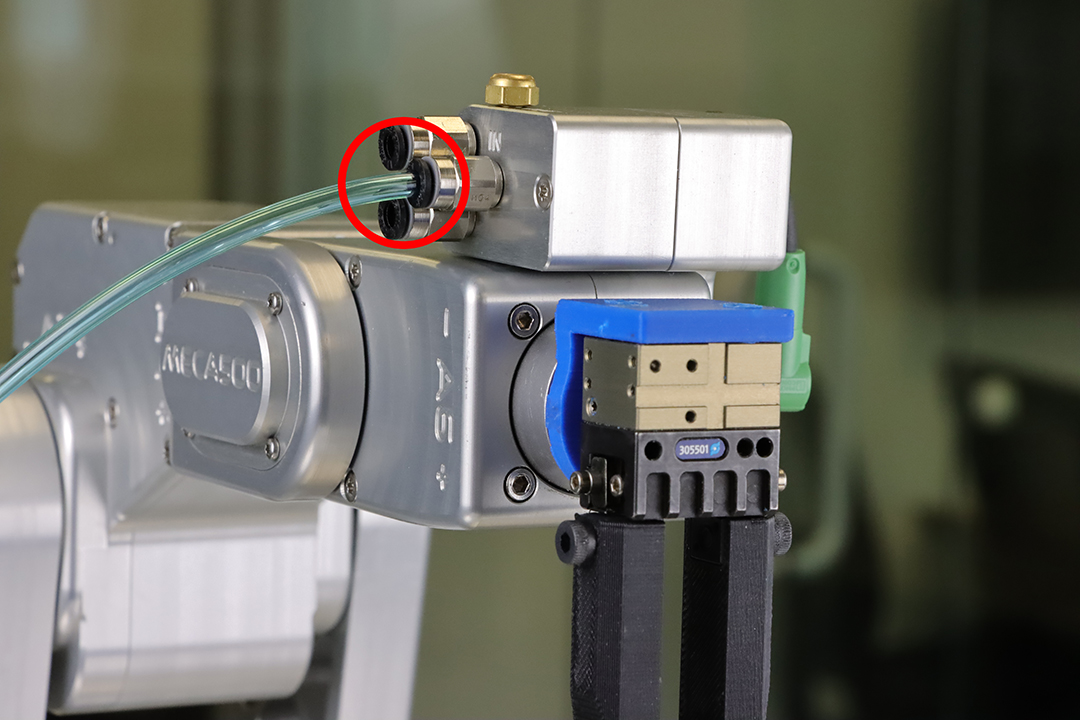
- Attach port A (gripper) to port 1 (Meca500) using a piece of pneumatic cable;
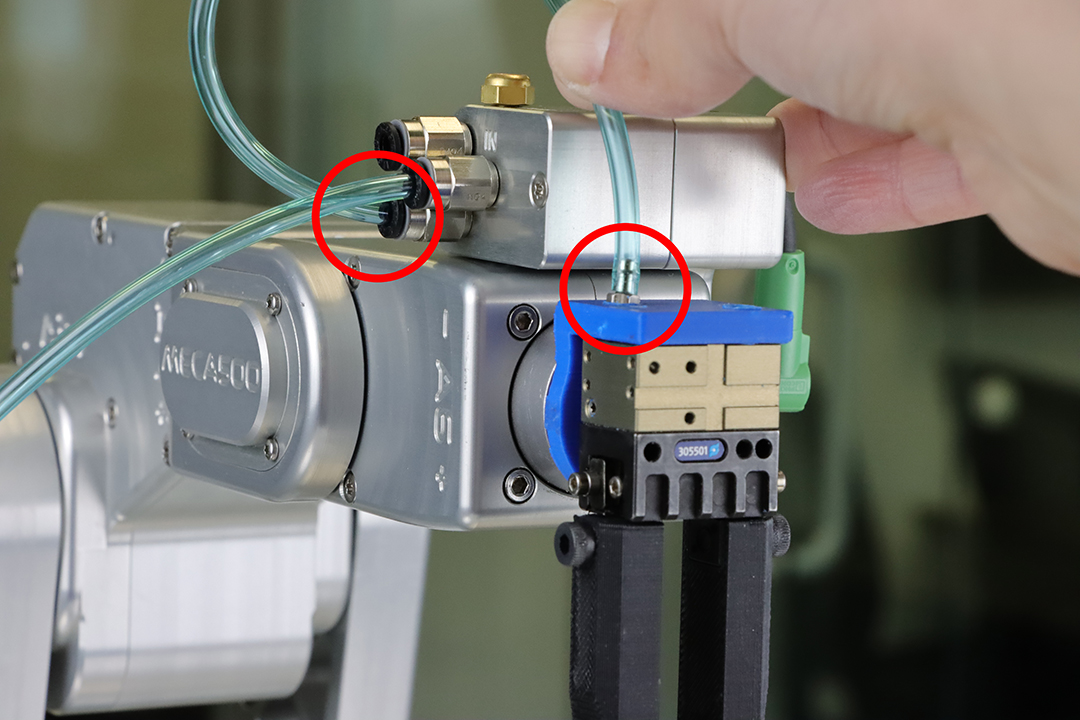
- Attach port B (gripper) to port 2 (Meca500) using another piece of pneumatic cable;
- Optional: add the pneumatic muffler to reduce noise.
Web interface code
The gripper's action can be tested with the Meca500's web interface. To learn how to use the web interface, please read the Programming Manual. Simply write and execute the GripperOpen and GripperClose commands to confirm that all connections are working. A simple pick-and-place command sequence is presented below. The sequence positions the robot with the MovePose() and MoveLin() commands. The gripper is then closed in order to seize the object, before placing it somewhere else and releasing it.
Please note that these examples are provided as-is by either Mecademic or it's Partners. These can be used as starting point for development and testing but Mecademic or it's partners are not under obligation to provide support and are not liable for any errors or unintended behavior caused by the examples. These examples could be updated over time.
Attachments
Attachments (1)