-3.png?height=120&name=MecaLogo-Black%20(1)-3.png)
Meca500-R3: Quick Reference Guide
Please read the User Manual carefully before proceeding to use the robot.
Setting up the robot
-
- Install the robot on a flat surface and secure it with the mounting screws
- Plug in the jumper connector / Dongle provided with the power supply unit to the safety I/O port. The robot cannot be activated without this connector being plugged in.
 Plug the male connector of the Robot Power Cable to the power supply unit and the female connector to the robot base. Ensure the connectors are secure
- Plug in the AC power cable to the AC power port. Ensure the AC power is within the specifications of 90-264 VAC, 50-60Hz
- If you have the MEGP25 Gripper unit, please proceed to install it as well and connect it to the gripper connector port available on the side of Axis 5. Refer MEGP25 user manual for detailed installation procedures
- Check the E-STOP switch is not latched. If latched, twist it clockwise to release it. Now switch on the AC Power and the switch on the AC Power port of the power supply unit
- You should see the Power LED glowing steady in green. Press Reset switch and you should see the Status LED glowing steady in amber. Now the robot is ready to be connected
- Install the robot on a flat surface and secure it with the mounting screws

Connecting the robot to a PC
-
-
Connect the Ethernet Cable provided with robot to the robot base and to the ethernet port of your laptop/PC directly. The robot has a default IP address of 192.168.0.100. Your laptop/PC must be configured to be in the same network.
-
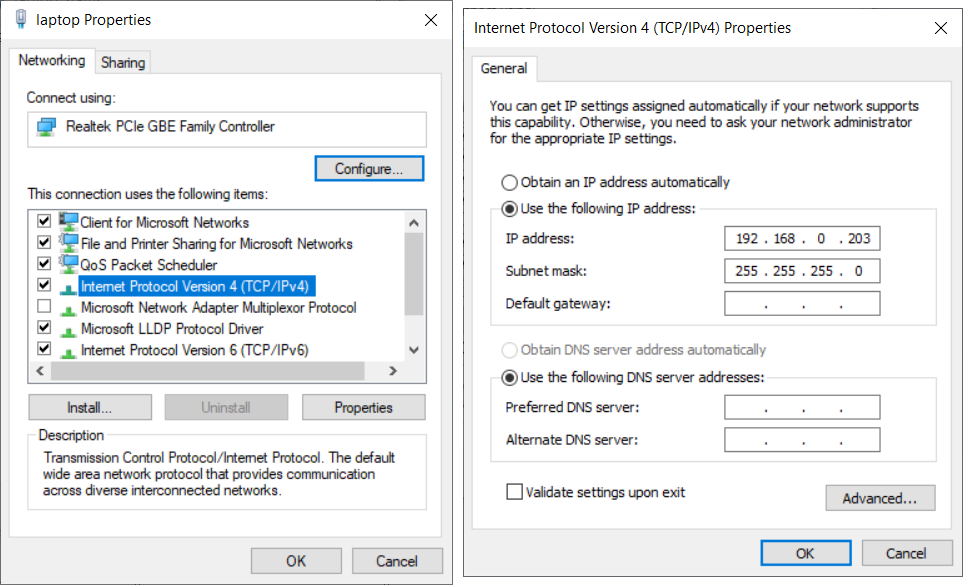
Got to Control Panel > Network and Internet > Network and Internet Sharing Center. Choose the correct network connection for the port over which you will connect to the robot to open the Connection status window

-
In the network connection, scroll to the Internet Protocol Version 4 (TCP/IP) and then select Properties. Configure the TCP/IP properties as shown below and click OK.
Using the Web Interface
-
-
-
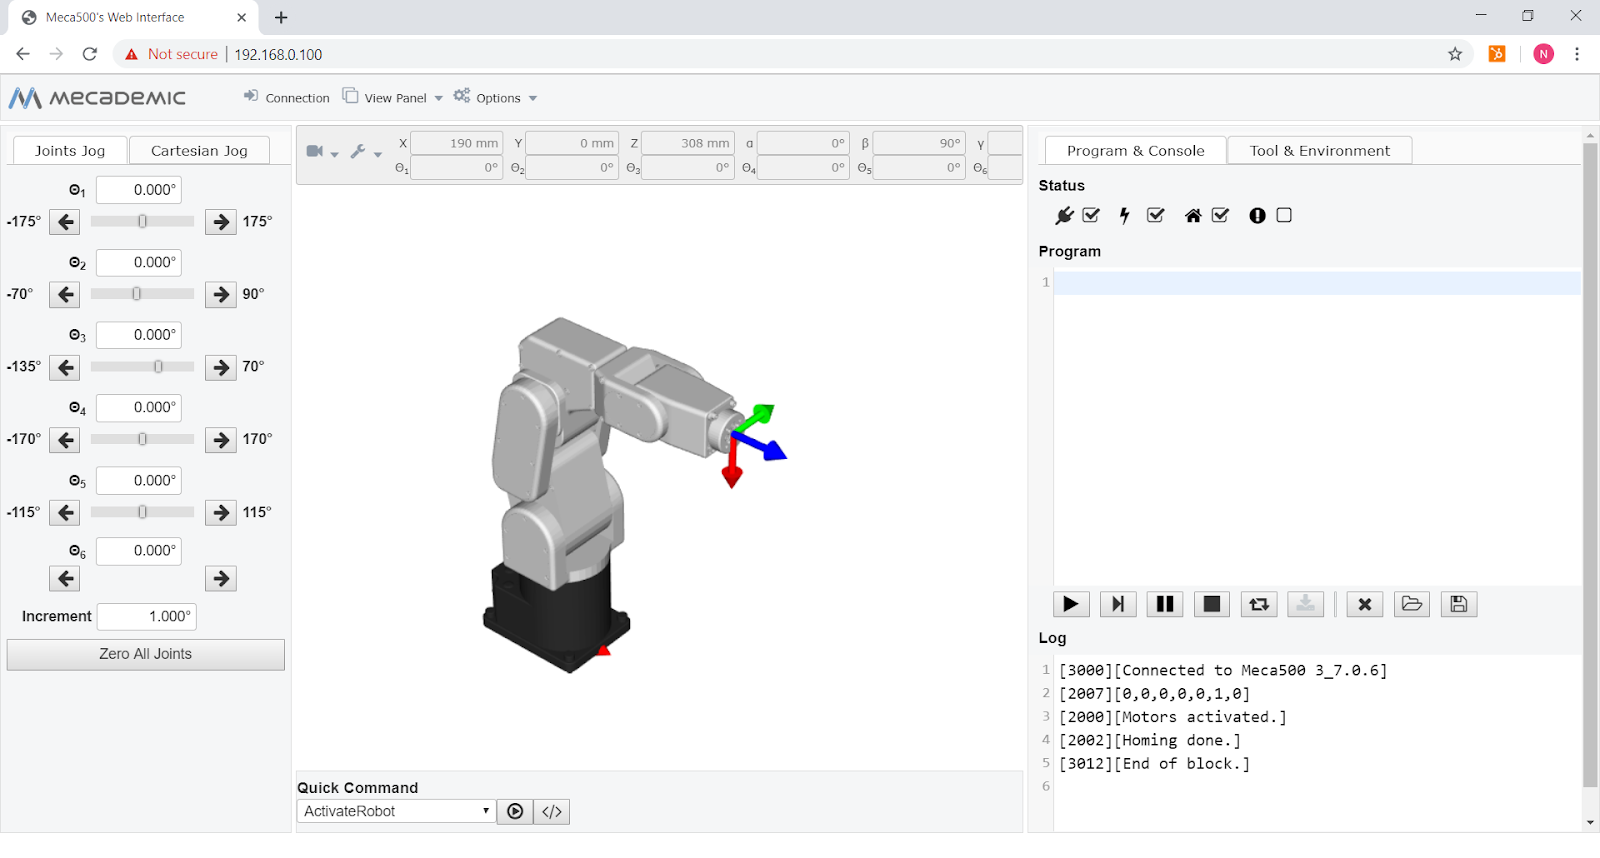
Open the Chrome Browser and enter the IP address of the robot 192.168.0.100. The web interface should open up as below. You can connect to the robot by selecting the
 checkbox in the programming panel. Activate the robot and home the robot by selecting the
  check box and then
  check box respectively.
 -
Click Zero Joints from the Jog panel to bring the robot joints to their absolute zero position.
-
-
Creating your first robot program
Please read the Programming Manual for detailed explanation of each command
In the programming panel, type the following code to make the robot draw a square.
SetJointVel(20)
SetCartLinVel(50)
MovePose(170,50,250,0,90,0)
MoveLin(170, 50,250,0,90,0)
MoveLin(170, 50,150,0,90,0)
MoveLin(170,-50, 150,0,90,0)
MoveLin(170,-50, 250,0,90,0)
MoveLin(170, 50, 250,0,90,0)
Click the  button to run the program.