-3.png?height=120&name=MecaLogo-Black%20(1)-3.png)
How Does Blending Work in the Meca500?
What is Blending?
Blending is when the robot moves to a point but does not stop, and goes directly to the next point. When blending movements, the robot will try to keep the same cartesian velocity when blending cartesian moves. Blending applies to both linear moves and point-to-point moves, however the two types of moves cannot be blended.
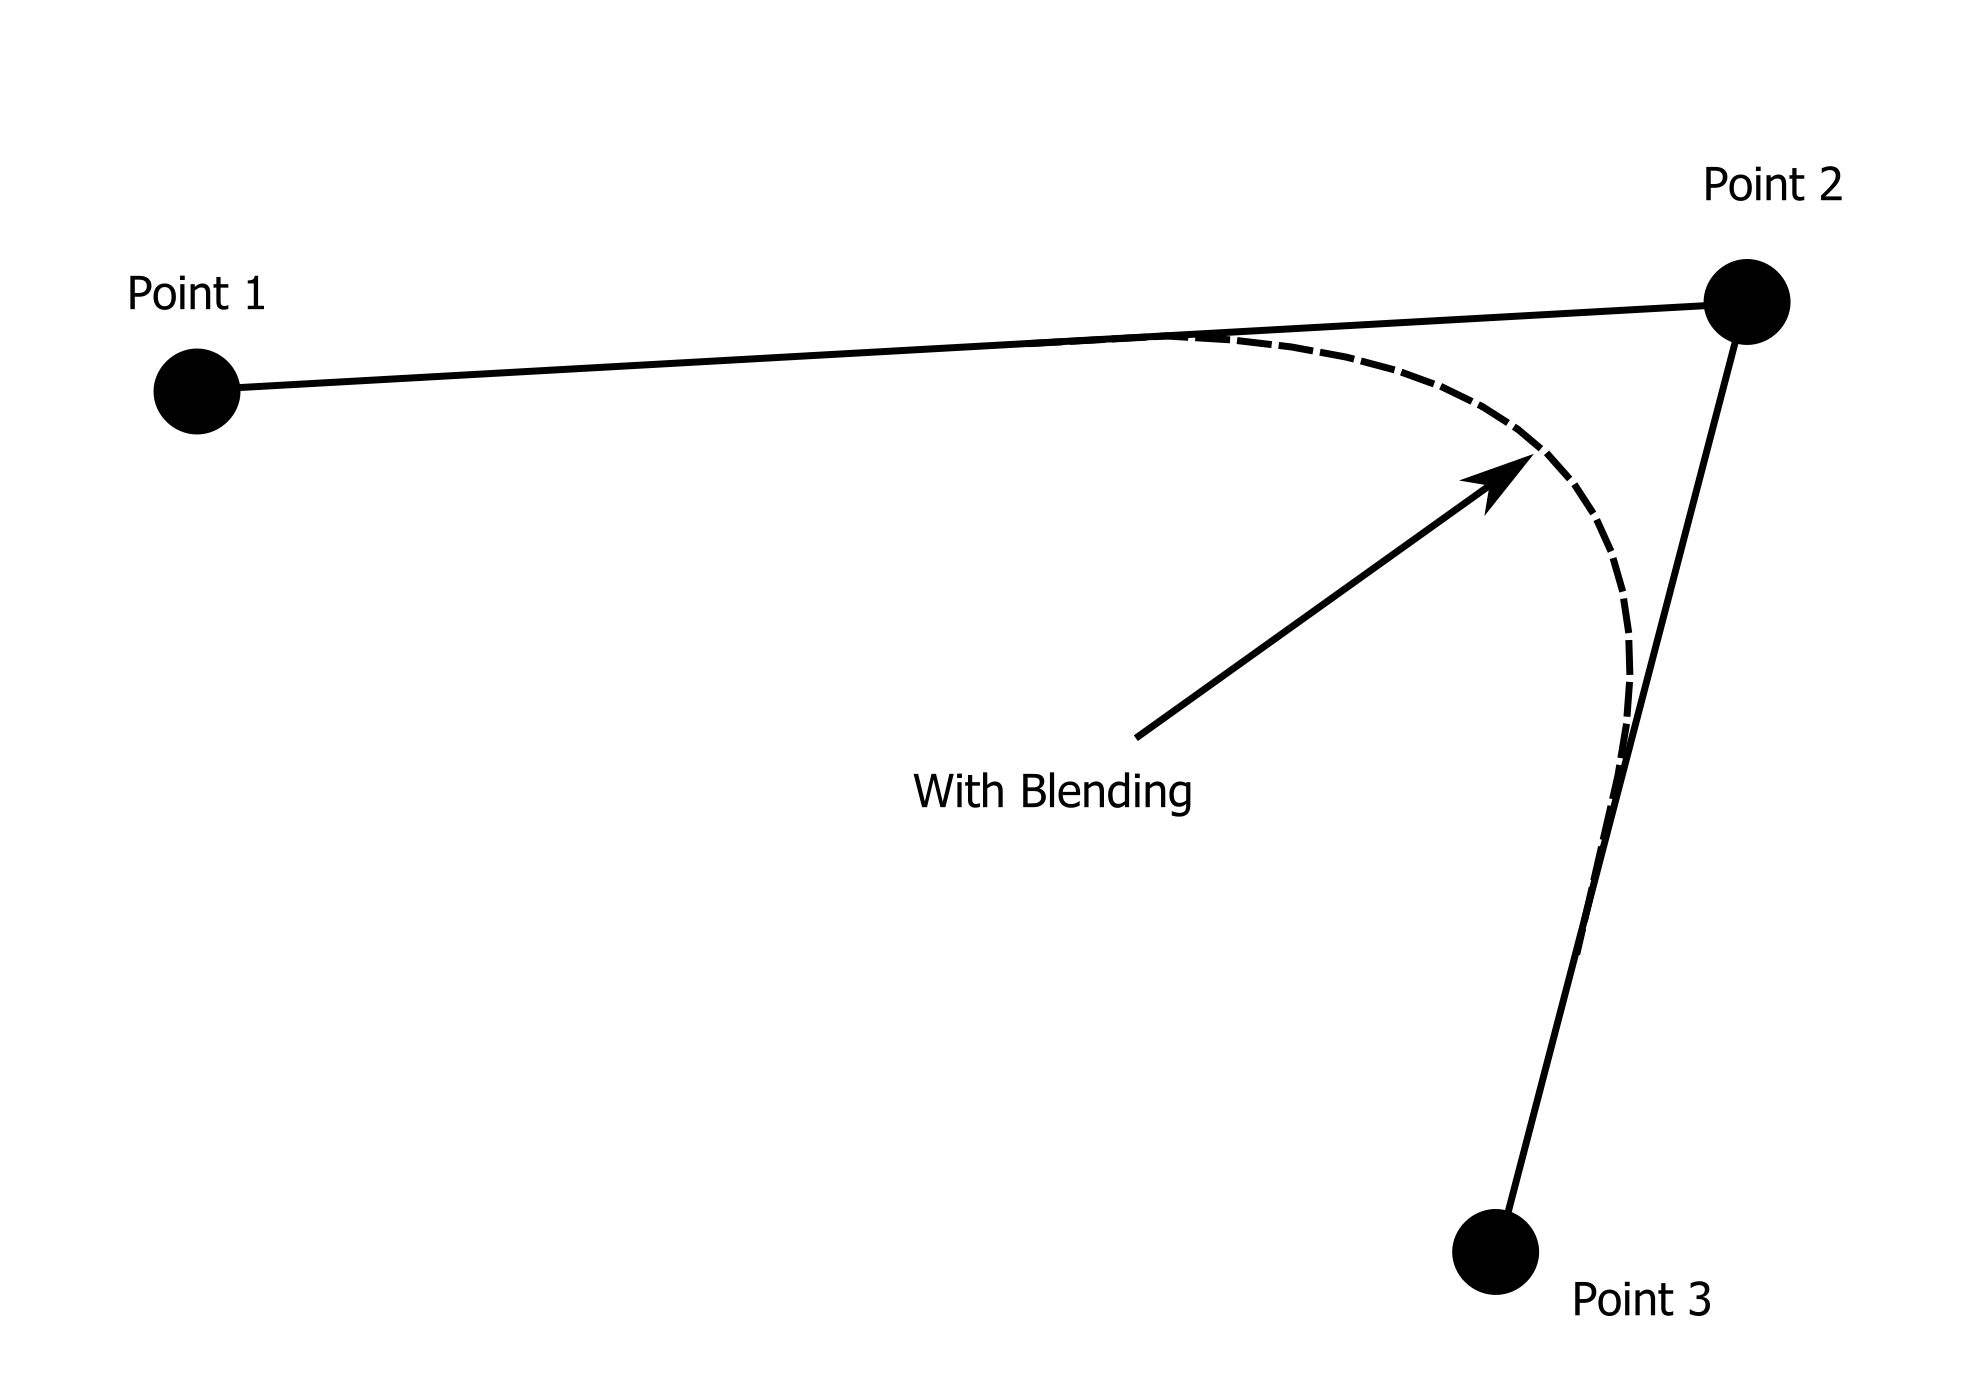
Blending can be implemented in different ways and every robot brand has their own method. For the Meca500, the blending is defined as a percentage, where 100% is the maximum possible blending and 0% is when blending is disabled.
When Do I Need Blending?
Because blending lets you keep the the TCP speed constant, it is mainly used for two purposes:
- Improving cycle time.
- Following complex curves.
Improving Cycle Time
If there is no blending (Blending set at 0%), the robot will come to a full stop for a fraction of a second at every point. It is therefore a good idea to use blending between movements unless it is absolutely necessary for the robot to come to a complete stop.
In most cases where the robot must stop completely, an action is performed by a tool or camera and the robot will have to wait. In this case, there is no blending since the robot will have some kind of wait instruction, which are not typically blended.
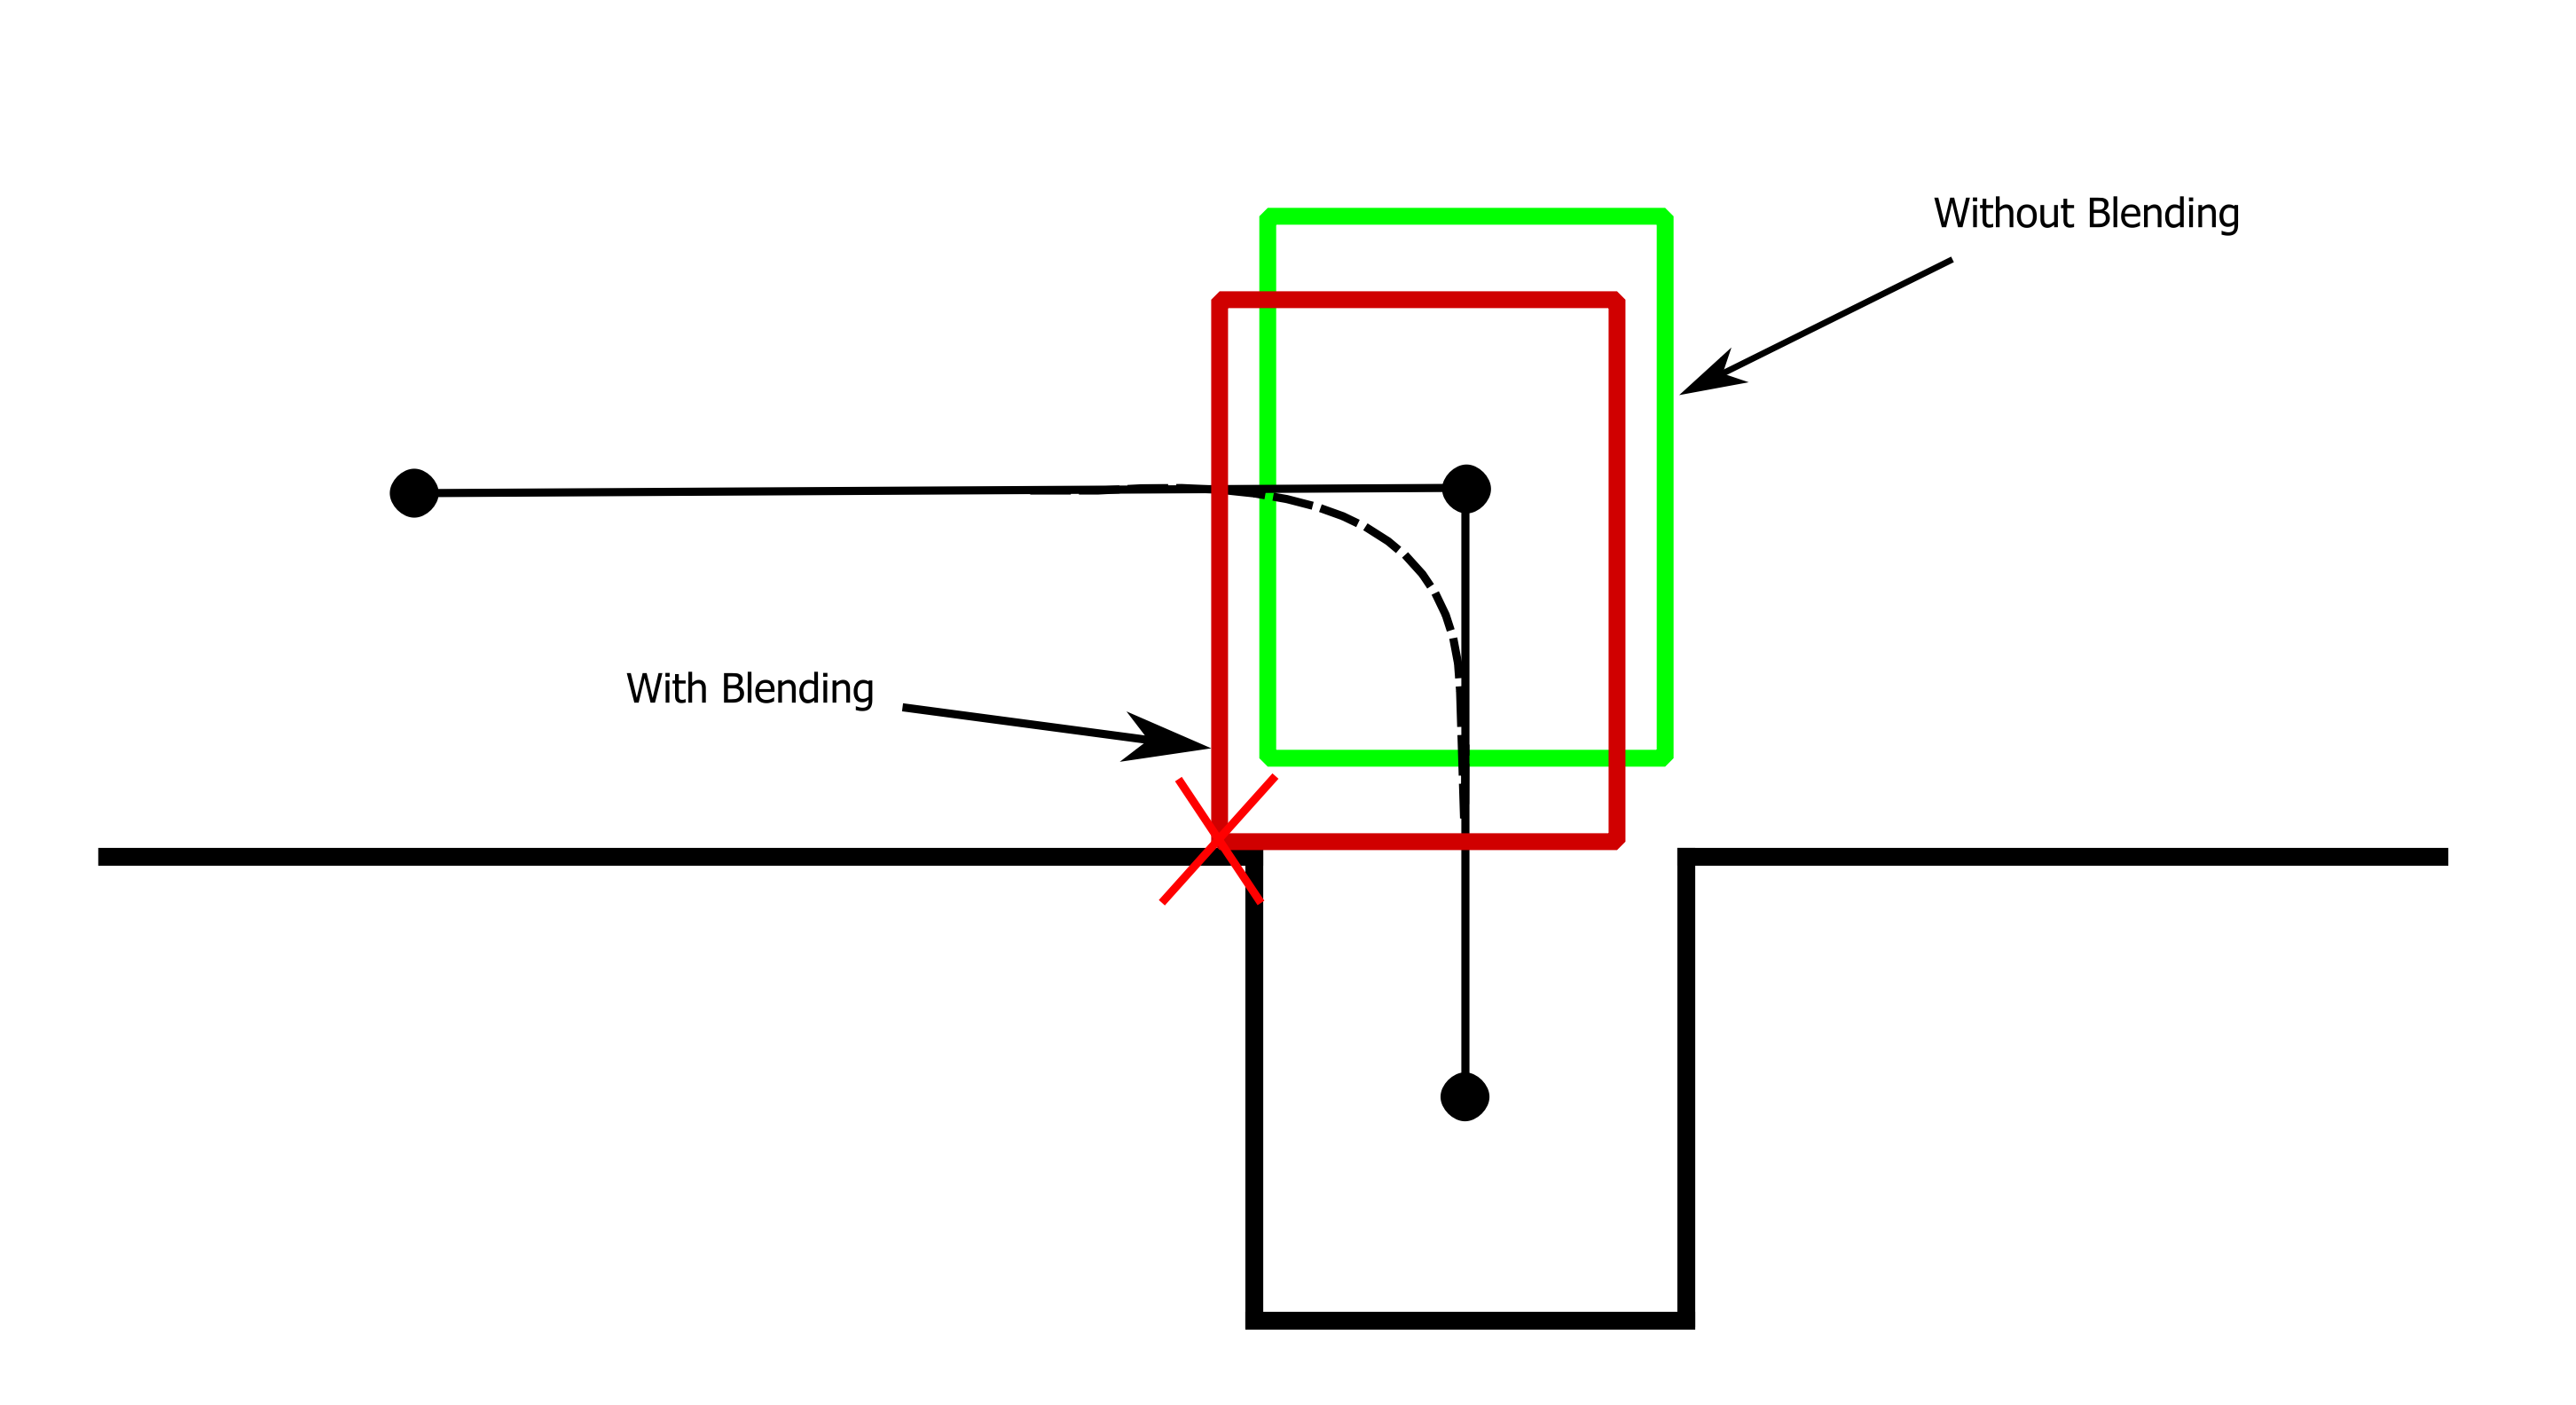
Blending might not be desired if moving in a straight line is very important. Blending would make the robot move out of the straight line trajectory when blending between several linear moves. For instance, during an insertion, if blending is used, the robot might hit the something in the cell while trying to blend the 3 points.
Following Complex Curves
The other reason to use the blending feature of a robot is to follow complex curves at a constant speed. This can be very useful for applications such as dispensing. Following a straight line with a robot is typically very simple, since most robots will have a linear move function. The most common way to follow a complex curve is to divide the curve into several points and use linear moves between each points.

In this example, the circle is divided into 12 different points for simplicity, but more points would be needed to ensure better accuracy. If blending is not used, the robot will stop at each point, which does not work when constant velocity is required. Blending ensures that the robot does not stop at every point but continues to the next one at the same speed.
There are many ways to create these complex curves; the easiest is to use software, such as RoboDK, which lets you import your part, extract curves and even program your robot directly. It is also possible to extract curves from CAD software, or use tools like MATLAB or python to generate curves algorithmically, or even scan parts using 3D scanners. Whatever you choose, once the curve is discretized, the blending will work the same way.
Blending on the Meca500
Blending curves is a fairly complex problem and can be computationally intensive. In the Meca500, blending works a little differently than traditional commercial robots where the path is pre-compiled. Since there is no compiling step and positions are streamed to the Meca500, blending is based on the acceleration and velocity parameters instead of a position away from a point in space. This means that blending with the Meca500 will be affected by the velocity and acceleration of the robot. The higher the speed of the robot, the more blending is applied.
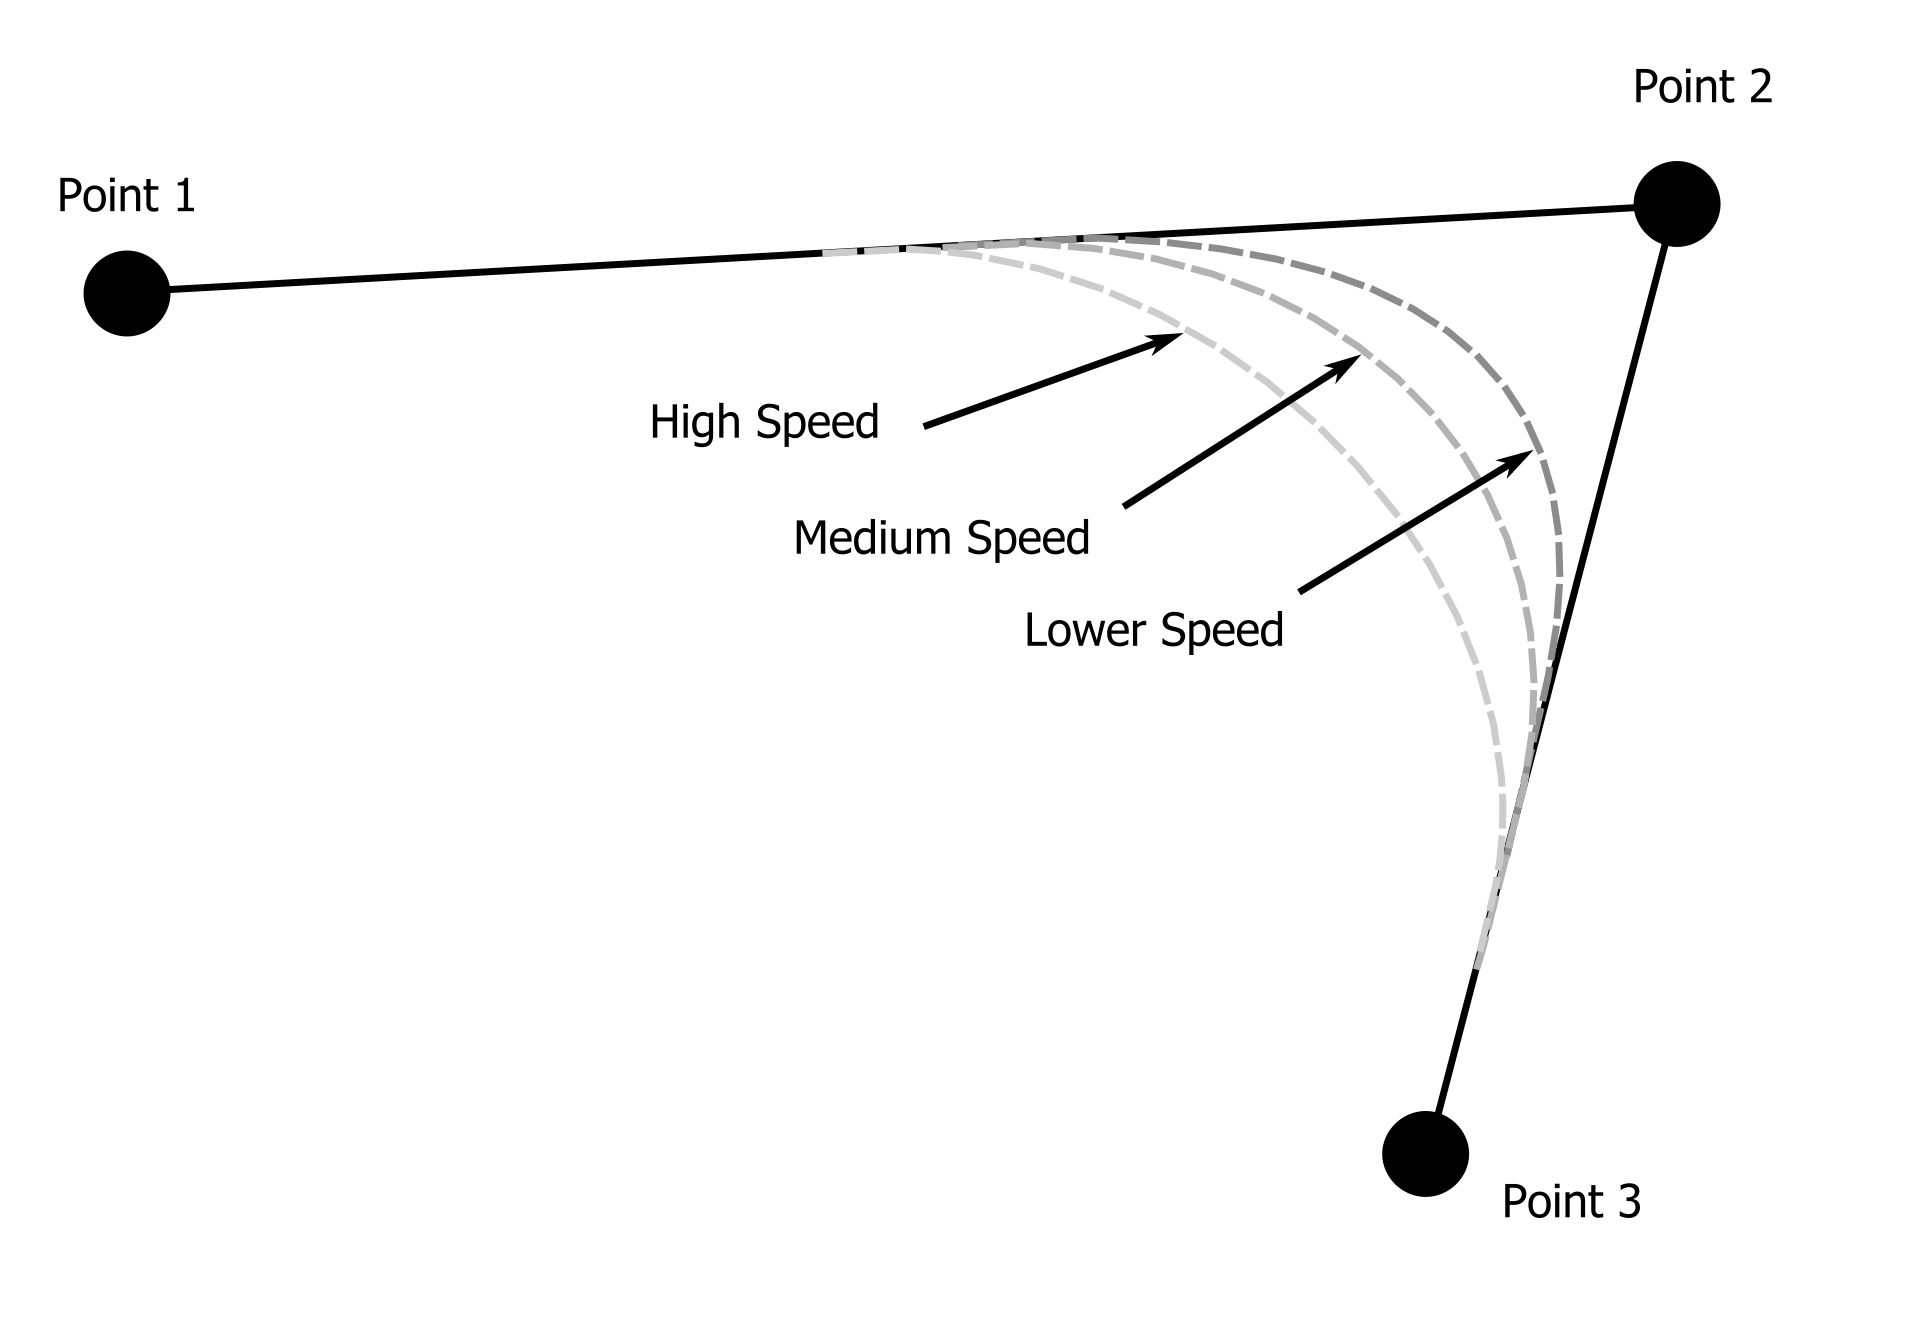
This image shows an approximation of how a path would change depending on the velocity setting of the robot. This means that, when preparing an application, you should always run it at the actual application speed during validation to make sure the path is correct.
Another example would be if the path is a complete circle and the diameter is important: the faster the robot goes, the smaller the diameter will be and the slower it goes, the closer to the points the robot will move, so make sure to test the path and velocity properly.
When using blending, it is possible to set the blending not to fully stop at the point, but to slow down and get fairly close. This is done by changing the robot blending parameters using the command:
| 1 | SetBlending(float) |
where the blending is a value between 0 and 100%. A value of 0 will make the robot reach the point and stop completely before going to the next one and a value of 100 will make sure the robot does not slow down and goes directly to the next point (if possible).
Note: since there is no compiling and all the commands are processed "online", there is no guarantee that the robot will be able to follow the trajectory without slowing down. One way to get better performance is to use the highest possible acceleration since this parameter also affects blending.
Conclusion
Applications that require blending and must follow a precise path will always require a certain amount of trial and error. It is no different with the Meca500 and will work well if you understand how blending is affected.